Showing posts with label t-shirt. Show all posts

8.26.2013

T-Shirt Upcycle: Adding a Customized Pocket (15 minute project!)


Here's how you can update an old t-shirt you don't wear very much with a cute little pocket in a print of your choice.

What you'll need:
T-shirt
Fabric of your choice
Thread
Scissors
Sewing machine (or hand sew)
Iron


I used cardboard and created a simple five point pocket by free handing it. You can skip this step if you want! I like to use the cardboard pattern for future projects.

Cut two pocket patterns from your fabric.


Place them right sides together & sew a 1/4 inch seam across the top.


Press the seam open.


Fold in half, enclosing the raw edges you just sewed & ironed. The right sides of the fabric should be on either side of the pocket. Then sew a seam about 3/4 inch down from the top.


Use an iron to press the raw edges of the pocket in. It should look something like this:


Pin the pocket directly on to the t-shirt. I put mine on the left side, but most pockets come on the right (FYI), just felt like being different.


Using the sewing machine, sew down the two sides and around the point at the bottom. Leave the top of the pocket open (do not sew across the top or you will no longer have a pocket but a patch). 


Done in just about 15 minutes! Repeat with as many shirts as you like! Enjoy!


6.21.2011

Tutorial Tuesday: Striped Tie-dye Tank

Here's a basic tutorial on how to make a stripped tee or tank using dye.

                                      From this...                                To this!
Materials:
Dye (Tulip or Rit; I used Rit)
Rubber bands for guides
Rubber gloves
A white tee or tank (I used a ribbed tank)
Boiling water
A disposable basin (or one you don't mind ruining from the dye)
A dark plastic or metal spoon to stir dye
First, boil the water. While you wait for that place rubber bands around sections of your shirt. You can do small stripes or large stripes; I chose to do two large stripes.

Once the water is boiled, pour the correct amount into the basin according to package directions.
Measure & add dye. Mix.

Place first "stripe" of the shirt in the dye using the rubber bands as guides. The shirt will act like a paper towel and absorb the dye past the rubber band. I think this looks awesome with different gradients of color. And don't worry if you get a few splashes of dye on your shirt, it's original and handmade! If you want very small stripes, applying dye to the shirt using a syringe or squirt bottle works very well. My stripes were very thick, so I dunked. Repeat for the next section & leave in dye as long as package directs. I did about 10 minutes per stripe.

Very carefully rinse each stripe in the sink until water runs clear.
Chelsea dyed hers with a squirt bottle and did thin stripes, also a great look.

Let dry before washing in the washing machine. During dye-day we were pressed for time & made the mistake of putting all our shirts together in the washer while wet so much of the dye bled. If you're using dark colors (blue, green, purple, brown, black) wash on a cold cycle!

Tank top: $3 for 3 (ie $1 for 1)
Dye: $1.66
Total: $2.66 with dye left over

homeworkTip Junkie handmade projects

4.05.2011

Tutorial Tuesday: Cinched Sleeve T-Shirt Makeover

Easiest project. Are you ready?

Grab a sleeved t-shirt that needs some extra love, and flip inside out. I have about 10 of these "boyfriend tees," the ones that are V-neck and have a little pocket. Cute! But I rarely wear most of them anymore because they're all the same. Here's a quick & easy way I revamped one. You'll need scissors, matching thread, elastic & a t-shirt (probably all things you have on hand, so this project is very cheap or possibly free).

Starting at the hem where the shoulder meets the sleeve, stretch a piece of thin elastic down the length of the sleeve & cut. Here's the length mine ended up:

Pin to the hem where sleeve meets shoulder and sew to hold it in place.

With the presser foot down, hold the shirt and stretch the elastic. Continue to slowly sew as you guide the shirt along. Backstitch a few times & trim the threads.


Repeat on the other sleeve, and YOU'RE DONE! So easy & it adds some jazz to an otherwise un-loved tee. What a CINCH (pardon the pun, I just had to!).

Seriously, the cinched look is all the rage. You could do this to the bottom of a pair of capri-length leggings, up the sides of a t-shirt, etc. The possibilities are endless. Oh and that darling necklace I'm wearing, more on that tomorrow!

Happy Tuesday!


Tip Junkie handmade projects
craft

1.10.2011

Old T-shirt to Trendy Tote Bag

Who doesn't have an old t-shirt looming around and taking up space in their closet? Let's be honest, I have too many. Most have some sort of sentimental value, so the idea of trashing them or getting rid of them makes me a wee bit sad. Here's an idea to up-cycle an old t-shirt that holds a special place in your heart. Convert it to a tote bag and it will have a special place for your groceries to nestle up inside. I originally saw this idea on Martha Stewart and have since seen many ideas for this project. I'm going the classic route & using an old t-shirt. You can also use up some fabric scraps to add some fun (& color). [I suggest adding embellishments at the beginning of the project; it makes things a bit easier]

Start with a flat, inside-out, washed & ironed t-shirt. Pin along the bottom of the shirt & sew. I like a rounder bottom, so I sewed an arc by the sides. Cut off the excess fabric.


Cut both sleeves off the shirt. These will be the handles.

Use a large bowl to trace around the neck of the shirt. Cut out the half circle you just traced. This will be the opening to the bag.

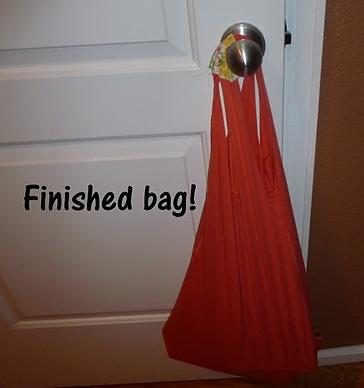
Now turn the shirt right side out and you're ready to load the new bag up with a change of clothes, some groceries, or books to return to the library. Here's my bag stuffed with books. It's quite stretchy & has a lot of room. A traditional tee works well too!


Easy peasy, lemon squeezy!